Apple’s iOS 18, launched on September 16, 2023, introduced a host of new features designed to enhance your iPhone experience. Among these, the Send Later feature in the Messages app stands out as a particularly helpful addition. This feature allows you to schedule your texts, ensuring you never forget important dates, reminders, or events. In this article, we’ll dive into how to use Send Later in iOS 18, along with other new features in the Messages app, to help you get the most out of your iPhone.
Schedule Messages with iOS 18
iOS 18 brought several innovative updates to the Messages app, including the long-awaited Send Later feature. Here’s a quick look at some of the key changes:
| Feature | Description |
|---|---|
| Send Later | Schedule messages to be sent at a later time. |
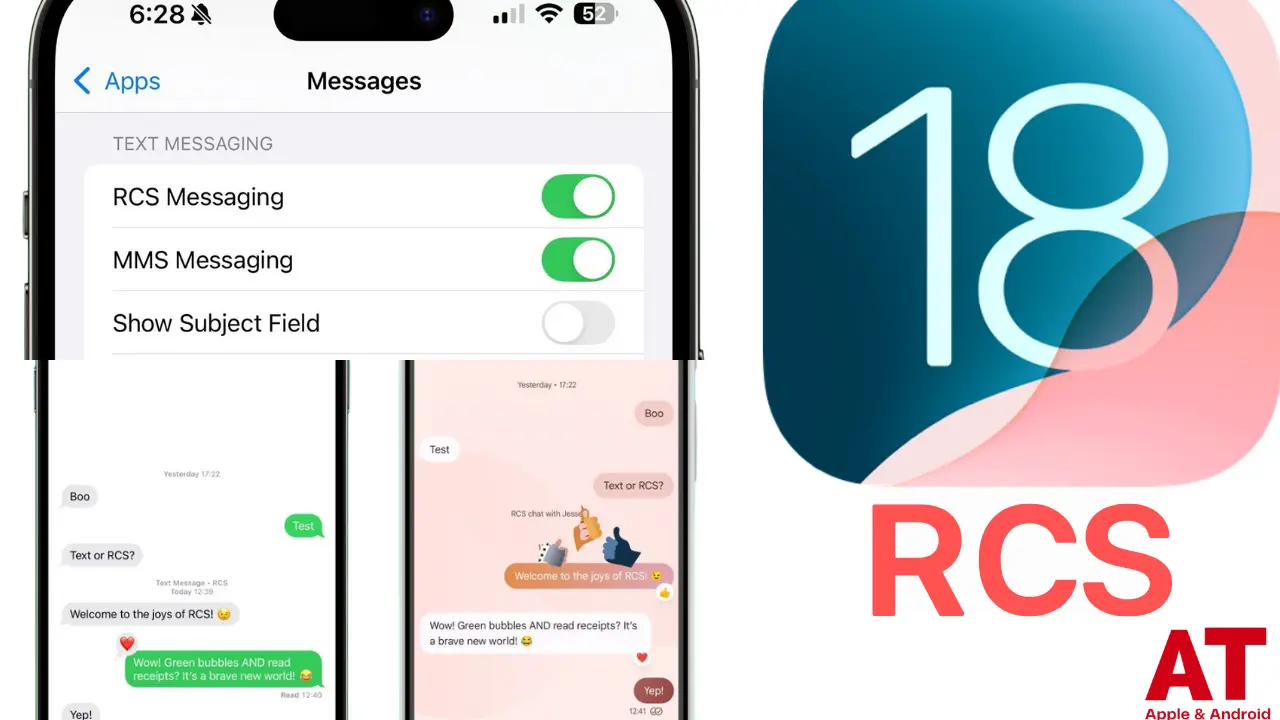
| RCS Messaging | Improved text quality and features for richer conversations. |
| Customizable Tapbacks | Use any emoji as a reaction in chats. |
| New Text Effects | Add fun and flair to your messages with new effects. |
How to Schedule Messages with Send Later in iOS 18
Scheduling a message in iOS 18 is quick and easy. Follow these steps to start using Send Later:
Step 1: Open the Messages App
Ensure that your iPhone is running iOS 18. Open the Messages app and either create a new message or open an existing conversation where you’d like to schedule a message.
Step 2: Type Your Message
Compose the text message you want to send. Don’t hit Send just yet.
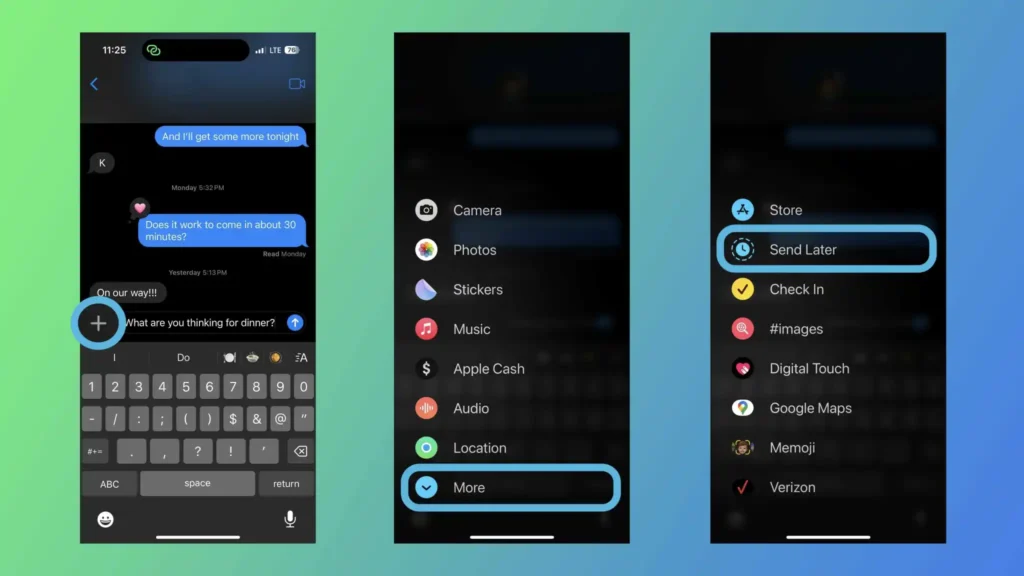
Step 3: Access the Send Later Option
To schedule your message:
- Tap the plus (+) sign next to the text field.
- If the Send Later option isn’t immediately visible, swipe down or tap More.
- Select Send Later.
| Action | What Happens |
|---|---|
| Tap + sign | Opens extra options for scheduling messages. |
| Tap More | Reveals the Send Later option if hidden. |
| Tap Send Later | Opens the date and time picker for scheduling. |
Step 4: Set the Date and Time
Once you tap Send Later, you’ll see a date and time picker. Choose when you want the message to be sent, whether minutes, hours, or even days later.
| Time Options | Description |
|---|---|
| Minutes | Schedule a message in the next few minutes. |
| Hours | Set a message for later in the day or evening. |
| Days | Schedule up to 14 days in advance. |
Step 5: Confirm the Scheduled Message
After selecting the time and date, tap the send button (the up arrow) to schedule the message. Your message will appear in the chat with a dotted-line bubble, indicating the scheduled send time.
Managing Scheduled Messages
After scheduling a message, you can manage it directly within the chat. Here’s how:
| Option | Action |
|---|---|
| Edit | Tap Edit to change the send time or date. |
| Send Now | Tap Send Message to send it immediately. |
| Delete | Tap Delete Message to remove the scheduled message. |
Long-Press to Edit
To edit the message content, long-press on the scheduled message and tap Edit, just as you would with a sent message.
Limitations of Send Later
While the Send Later feature is incredibly useful, it comes with a few limitations:
| Limitation | Details |
|---|---|
| iMessages Only | Only iMessages can be scheduled; SMS texts are not supported. |
| Two-Week Limit | You can only schedule messages up to two weeks in advance. |
How to Customize the Send Later Feature
If you use Send Later frequently, you can make it easier to access by adding it to your settings:
| Step | Action |
|---|---|
| Go to Settings | Open Settings > Messages. |
| Drag Send Later | Move Send Later to the first page of settings for quick access. |
Other New Features in iOS 18’s Messages App
In addition to Send Later, iOS 18 brought several other enhancements to the Messages app:
| Feature | Description |
|---|---|
| RCS Messaging | Brings enhanced messaging quality, encryption, and new features. |
| Custom Tapbacks | React to messages with any emoji, rather than just the standard six. |
| New Text Effects | Fun text animations to make your conversations more engaging. |
